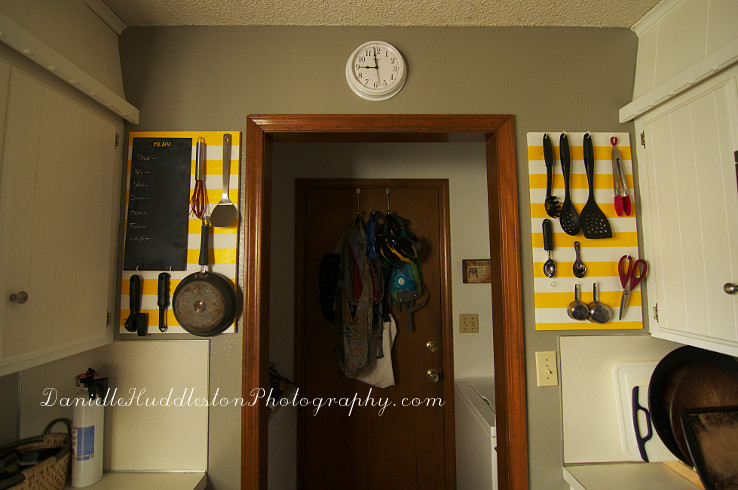
 I decided I wanted to hang up some things in my kitchen after seeing this pegboard at A Beautiful Mess.
The problem, the only wall in my kitchen is right where I have to open cabinet doors.
My husband helped me realize it would not work to hang a pegboard because it would stick out too far.
After trying to search online for a something thin to hang utensils on and failing, I decided to make my own.
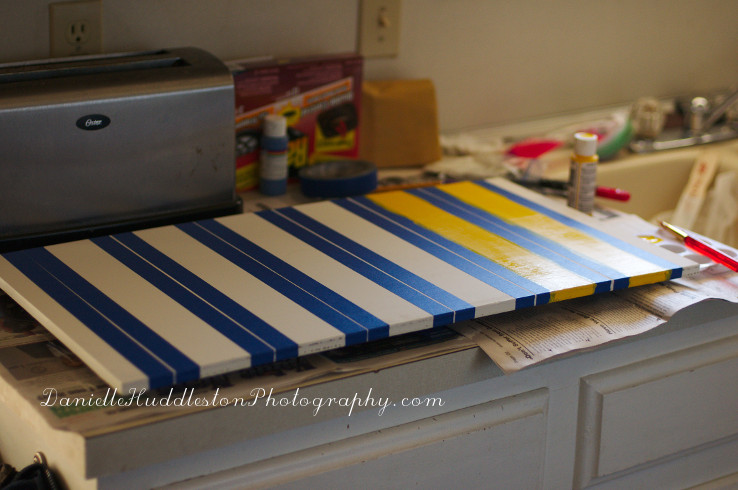 My husband cut me two pieces of plywood and I painted them white.
Then I measured and marked every two inches, taped it off, and started painting.
 I just used an outdoor craft paint I already had.
I took the tape off while the paint was still a little wet.
I layed out all of the things I wanted to hang up and tried to figure out where I wanted them.
Then I marked the spot with a pencil.
I bought hooks from walmart to put in my boards but I hate trying to screw them in!
I found the easiest way was to hammer a small nail into the spot I wanted to put the screw, pull it out, then screw in a screw a little ways with a screwdriver.
I then took it out and screwed the hook in.
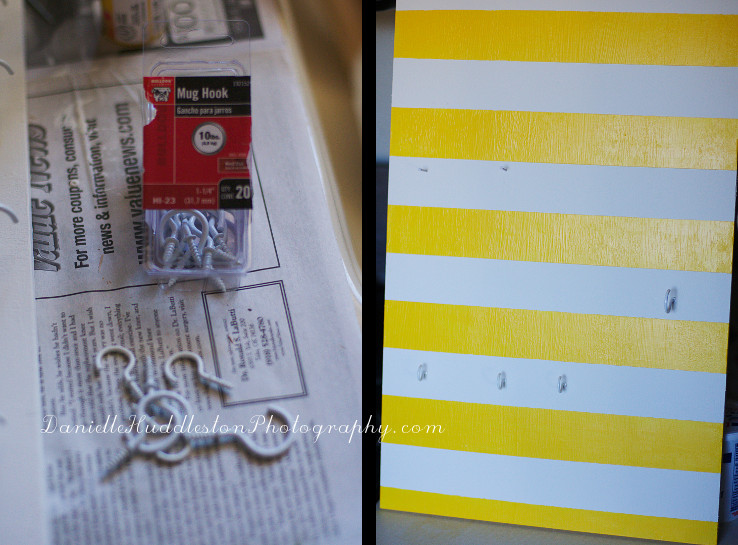 This worked vastly better then trying to just screw the hook straight into the board.
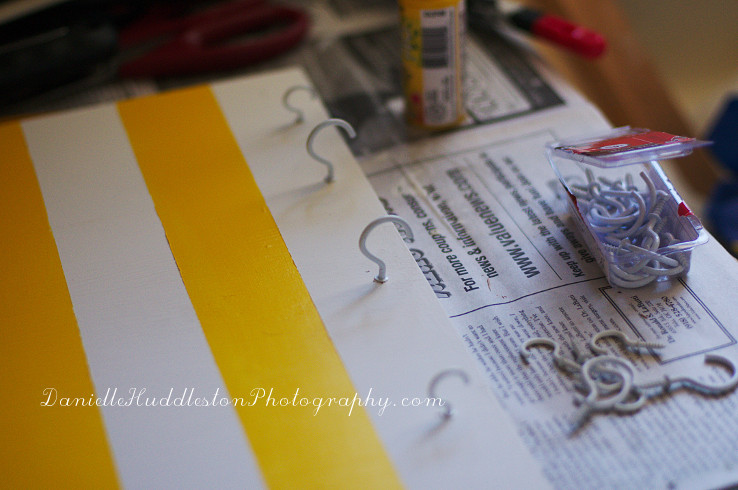 I bought small hooks and mug hooks.
It is best to check and make sure what you want to hang with work with the hooks first.
Some things were too big.
After I was done making the boards I screwed the boards directly to the wall.
I tried to find the wall studs but was unsuccessful (many, many times) despite the fact I was using a stud finder.
My husband had to show me where they were and they were not in the right spots for the boards.
The walls hate me.
I used anchors for three of the fours screws.
I was able to hit a stud for one of the screws (miracles do happen).
 I used two hooks to hold up my menu board.
I have had it for a while and did not want to give it up!
I am glad I was able to work it in!
 I used some white nails for things that did not fit well on the hooks.
After doing the first board I realized it would have been better to use nails instead of hooks on the top row.
It is a little harder to get the spoons off the hooks that are high up.
Other then that I really like them!
It helps me feel like I am using all of my space to it’s fullest also!


